Over the years, Salesforce has become the backbone of businesses worldwide—helping organizations manage customer relationships, streamline sales, and optimize service. But as technology evolves, so do user expectations.
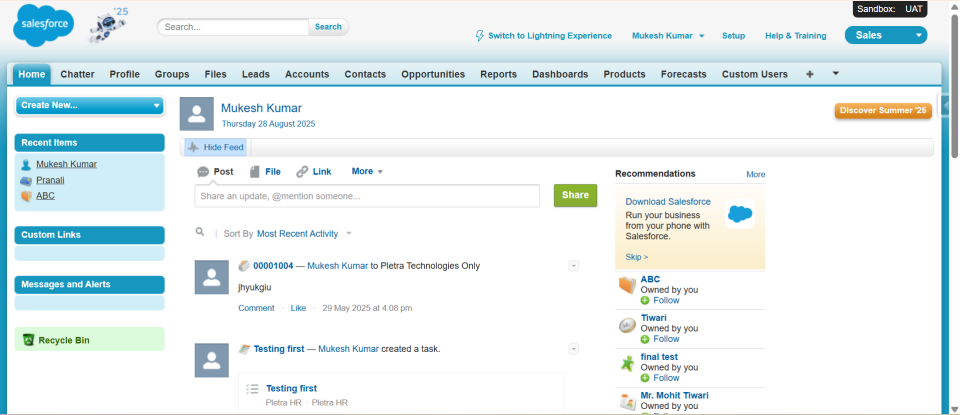
Salesforce recognized this and introduced Lightning Experience, a modern, intuitive, and smarter UI built to replace the legacy Classic interface.
Yet, many companies still find themselves stuck in Classic mode, hesitant about the migration journey ahead. That’s why a comprehensive Salesforce Lightning migration guide is essential—so businesses can move confidently and unlock Lightning’s full potential.
In this blog, we walk step by step through the why, what, and how of Salesforce Lightning migration—covering strategies, best practices, and pitfalls to avoid.
If you’ve been eyeing Salesforce Lightning Experience but haven’t made the leap from Classic yet, this Salesforce Lightning migration guide is your no‑fluff, practical roadmap.
You’ll get a clear migration strategy, checklists, timelines, and adoption tips—so you can move fast, minimize risk, and realize the productivity and UX gains your stakeholders have been promised.
What you’ll learn: how to use the Lightning Experience Transition Assistant, Readiness Check, Salesforce Optimizer, Lightning App Builder, and modern deployment paths (e.g., DevOps Center) to plan, build, test, and roll out Lightning—without derailing business as usual.
Salesforce Classic : –

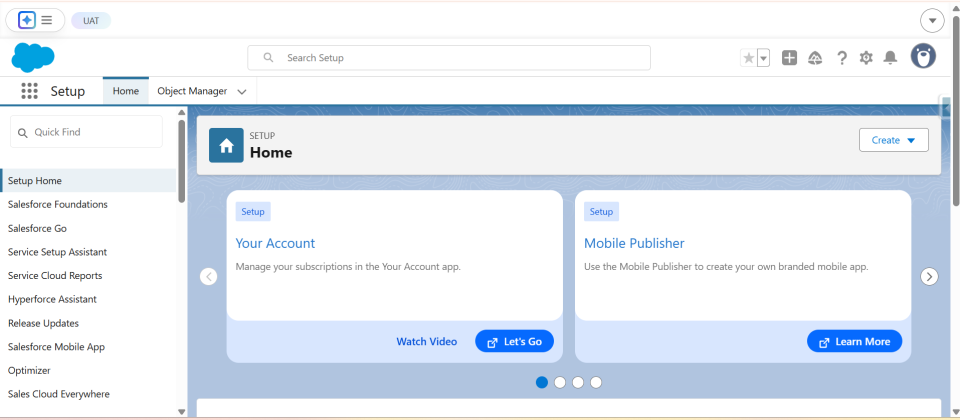
Salesforce Lightning : –

Salesforce Lightning isn’t just an interface upgrade—it’s a complete redesign of the Salesforce platform. It comes with:
A modern, user-friendly UI.
Lightning Components for faster customization.
Einstein AI integration for smarter insights.
Better mobile-friendly experiences.
Streamlined workflows with automation tools.
Simply put, Lightning helps teams work faster, smarter, and more productively.
Lightning isn’t just a UI facelift; it’s an experience layer that enables productivity patterns you can’t replicate in Classic—think dynamic pages, richer list views, better navigation, and modern component‑based apps you can tailor to each role.
The Lightning Experience Transition Assistant packages the entire journey into three phases—Discover, Roll Out, Optimize—so you never lose the thread.
Success looks like this: measurable time saved per rep via tailored record pages, fewer clicks to key actions, higher adoption of features introduced in Lightning, and a steady decline in org complexity thanks to Optimizer‑guided cleanup.
Gather a cross‑functional squad: admin(s), dev(s), QA, ops, power users, and an executive sponsor. Align on 3–5 hard metrics (e.g., “reduce time‑to‑create‑opportunity by 25%”). Then open Setup → Transition Assistant to orient the team and capture your initial scope.
Pro tip: The Transition Assistant includes guidance on stakeholder alignment and change management—use it to structure your kickoff.
Run the Lightning Experience Readiness Check. You’ll receive a personalized report highlighting user profiles ready for Lightning, items that need fixes (e.g., JavaScript buttons), and recommended workarounds.
Next, launch Salesforce Optimizer to surface unused metadata, limits you’re approaching, and features to tune. It can run in sandbox or production and provides actionable recommendations you can track over time.
Nothing slows a migration like technical debt. Use your Optimizer results to:
As you review customizations, open the Lightning Experience Configuration Converter to systematically replace JavaScript buttons, update hard‑coded URLs, and prep Visualforce for Lightning styling.
You have two native options:
If you’re starting fresh, consider building your Integration → UAT → Staging → Production pipeline with DevOps Center for traceability and fewer deployment surprises.
Spin up Developer or Developer Pro sandboxes for configuration and a Full/Partial sandbox for integrated testing. Package your changes via Change Sets or DevOps Center and validate in each stage before promoting.
UAT essentials:
This is where Lightning shines. With Lightning App Builder, you can build:
Start with high‑impact objects (Opportunity, Case) and use Dynamic Forms and Accordion/Tab layouts to reduce scroll and surface fields contextually. Trailhead’s App Builder module walks through the UI and best practices.
Audit your Visualforce pages for Lightning styling and performance. Where you have Aura components, consider a phased shift to Lightning Web Components (LWC)—the standards‑based framework Salesforce recommends for performance and maintainability. Salesforce provides a mapping between base Aura and LWC components to guide refactors.
When to refactor vs. wrap:
Great UX + great training = adoption. Build a change enablement plan:
The Transition Assistant includes rollout guidance and adoption insights you can reference as you plan communications and staged enablement.
Don’t “big‑bang” unless your footprint is tiny. Use a wave deployment:
Use your deployment method (Change Sets or DevOps Center) to promote final metadata to production, validate tests, and schedule your go‑live window.
Post‑launch, schedule Salesforce Optimizer monthly or quarterly to keep the org healthy and identify quick wins. The app can run automatically and provides a sortable view of issues with severity to help you prioritize.
Pair this with adoption dashboards (logins, page usage, feature clicks) and a steady stream of micro‑improvements to build trust with users. The Transition Assistant’s Optimize phase has guidance on measuring success and encouraging sustained use.
Q: Will Classic go away the moment we enable Lightning?
A: No—Lightning can be rolled out in stages, and you can keep Classic available during transition while you perfect Lightning pages. The Transition Assistant is designed for phased adoption.
Q: Do we have to rebuild all our Visualforce pages?
A: Not necessarily. Apply Lightning styling where needed and modernize selectively. Prioritize high‑impact pages; plan a gradual shift to LWC for performance and longevity.
Q: Is DevOps Center mandatory?
A: Not mandatory, but highly recommended as your org scales. It brings source control and pipelines to admins and reduces dependence on manual Change Sets.
Migrating to Lightning isn’t optional—it’s inevitable. Salesforce is investing heavily in Lightning Experience, continuously rolling out updates, tools, and innovations. Sticking with Classic risks falling behind in productivity, user experience, and long-term competitiveness.
The ultimate Salesforce Lightning migration guide comes down to this:
Evaluate readiness
Define goals
Clean up and customize
Pilot, train, and roll out in phases
Optimize continuously
Do it right, and Lightning will unlock greater adoption, efficiency, and business growth.
So, take the next step: migrate with strategy, involve your teams, and embrace the future of Salesforce.
Read more : How to Migrate Legacy Data to Salesforce: A Step-by-Step Guide! (2025)
